My 2010 technology 66 Bug

Here's the spot to show off your 1966 Beetle Restoration projects
Post Reply
User avatar
agggilli
Senior Member
Posts: 116
Joined: Fri Mar 19, 2010 7:15 am
Location: Greenville, NC

Post by agggilli »

I got some more accomplished this weekend, even with Mothers Day. My friend Jeff came over on Saturday and did the finish welding on the heater channel. I also got the front bulkhead repaired. I did not replace the entire part, I just cut off a new portion from the panel I purchased and we welded that in place. Jeff had to leave before we got the rear quarter panel and front lower wheel house skins back in place. I'll do those on my own, as I can get them in pretty good myself. I just wanted to make sure that the main structure of the car (heater channel) was welded really good, and Jeff did that.
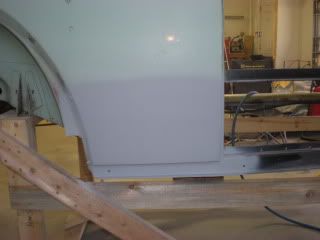
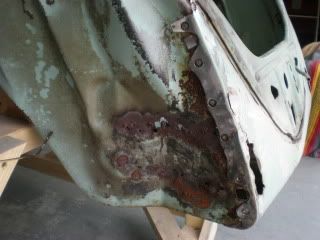
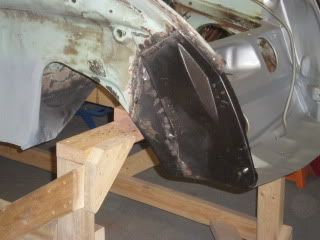
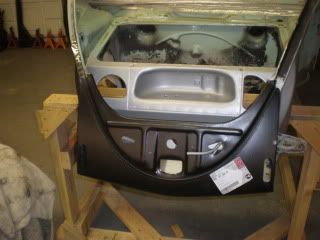
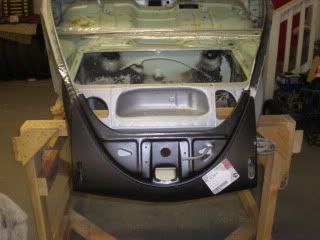
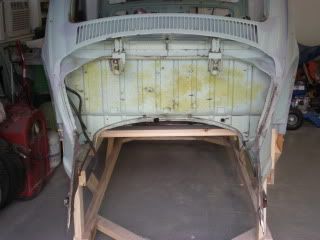
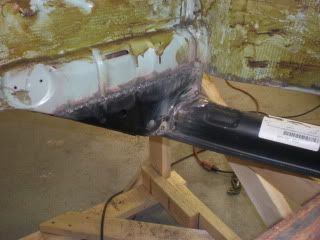
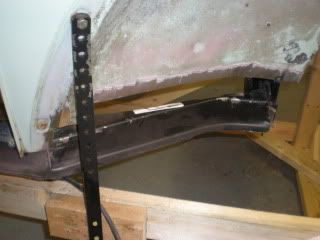
I did get the rear completely finished and two coats of "Rust Bullet" applied on both the inside and outside of that area. I am really happy with the Rust Bullet and plan to do the entire inside of the car from the front door back with it prior to installing the sound deadening material. I also got the electrical panel built for my Spot welder tonight after work. I think it may work, but we will see. I should get the arms and contact tips done tomorrow evening and maybe give it a test run.

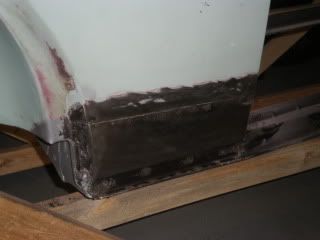
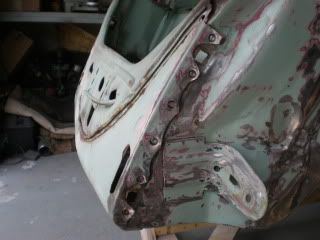
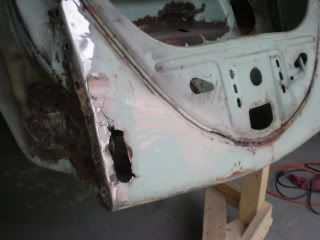
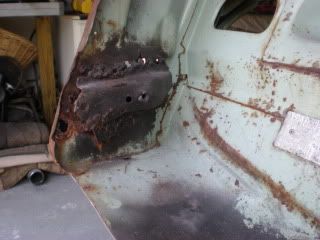
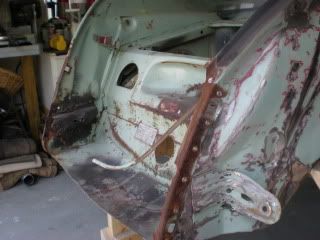
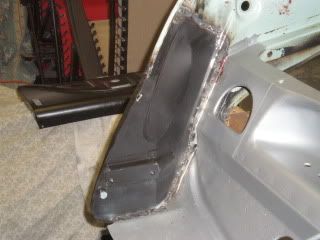
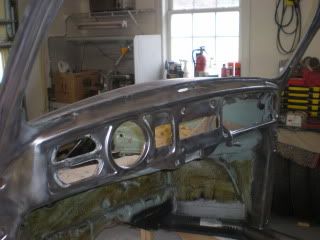
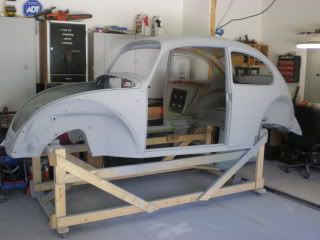
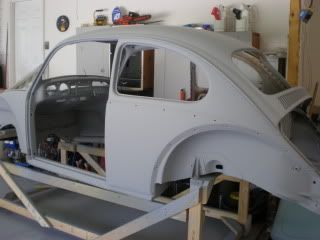
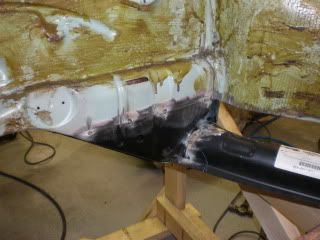
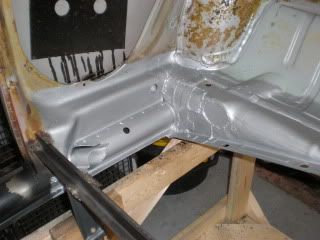
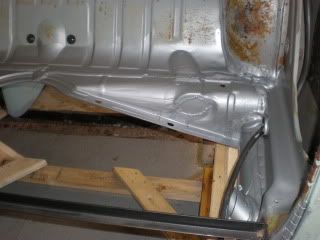
Here are some shots from the work this weekend. First the front bulkhead panel piece tacked then welded in place, and my friend welding in the heater channel.
ImageImageImage

ImageImage

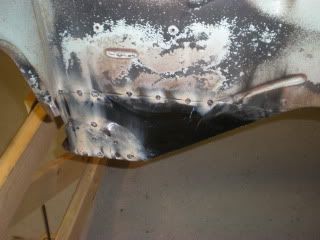
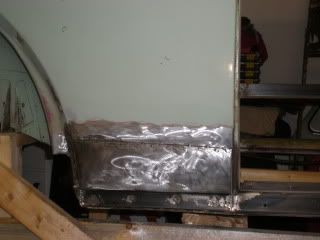
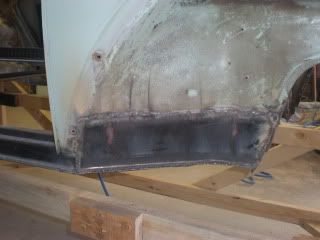
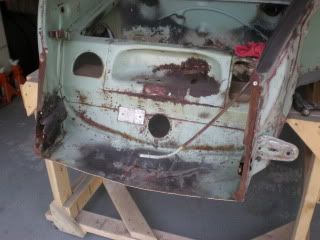
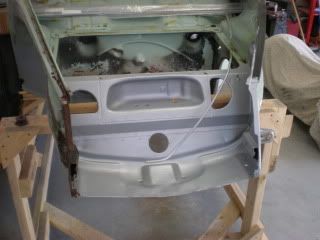
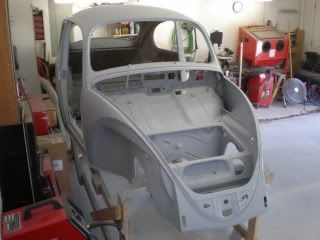
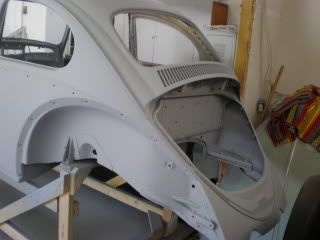
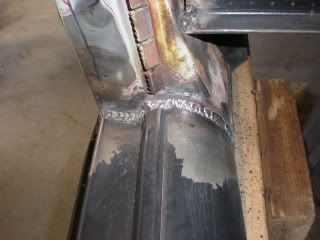
Here is what a weld looks like when you know what you are doing. Then the rear complete with "Rust Bullet", less seam sealer.

ImageImageImage

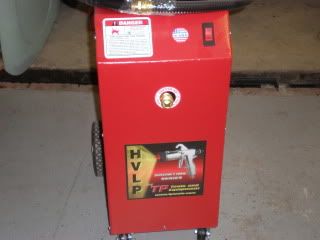
So I hope to get the spot welder done in time to weld in the front and rear aprons and hood seal strips. If it actually works in my testing I will add a timer so I can get consistent welds. Right now it is just hooked up to an electrical switch. I have two microwave transformers with the primary coils hooked up in parallel and the secondary coils hooked up in series to give me increased current. I removed the secondary windings and used 4 gauge welding cable to place three wraps around each coil. One transformer is sufficient to spot weld 20 gauge or higher metal. I'm hoping by having two transformers in series I can spot down to 16 gauge. It is all experimental at this point, but I only have about $50 invested in it, so it isn't a real big deal if it doesn't.
User avatar
agggilli
Senior Member
Posts: 116
Joined: Fri Mar 19, 2010 7:15 am
Location: Greenville, NC

Post by agggilli »

Good morning all! I finished the outer skin replacements on the RH rear quarter panel and the RH front wheelhouse rear section yesterday. Other than applying seam sealer from the inside, this completes the removal/replacement of the bad rotted out RH heater channel and associated rotted out areas on that side of the car. I first welded the skins into place, then applied a thin layer of bondo at the seam areas. Using a straight line body sander I smoothed it all out and then primered it. I will still need to block sand it all, but for now I am very happy with it. Here are the pictures.

The rear quarter panel welded in, then completed:

ImageImageImage

The RH wheelhouse skin welded in, then finished:

ImageImageImage

Today I plan to remove all the metal bracing I welded in a few weeks ago and get that all cleaned up. I'll also probably start drilling out the spot welds for the front apron. I have a RH front wheelhouse section coming in tomorrow along with the rear apron, so the next pictures and work will be for the front RH wheelhouse section replacement and the front apron, followed by the rear apron replacement. Hopefully these will be a little easier than the heater channel was.

Oh yeah, the spot welder did not pan out. I got it all together and it does indeed spot weld, but the second transformer did not step the current up enough to do the 16 - 18 gauge metal. It will do 22 - 24 gauge with no problem, but won't work for this, so the mig will continue to be the tool of choice.
User avatar
rokemester
Senior Member
Posts: 274
Joined: Wed Mar 18, 2009 9:46 pm
Location: Cleveland, Ohio

Post by rokemester »

You're doing a great job documenting all of your work! I'm definitely staying tuned and watching your progress.
User avatar
agggilli
Senior Member
Posts: 116
Joined: Fri Mar 19, 2010 7:15 am
Location: Greenville, NC

Post by agggilli »

It was a solid weekend of work on the car this weekend and I pretty much have all the metal replacement and welding done on the car. I still have not removed the bracing I installed, but it will be the next piece I do. Basically, I removed the old beat up and rusted front apron so I could cut out the rusted front RH wheelhouse section that was blown full of holes by someone trying to weld in a new bumper mount. I got it tacked in place then bolted on the front fender to check the placement. I wound up taking it loose and refitting it. I then welded it in place and put seam sealer on the inside.

ImageImageImage

ImageImageImage

Next I fitted the front apron and got it all ready to weld in and decided it would be easier to clean all the rust and paint from the wheel well and that whole front area with it off. I wire wheeled and sanded it all then gave it two coats of Rust Bullet. I refitted the front apron and welded it in place on both sides and the bottom. Next I put seam sealer on all the joints.

ImageImageImage

ImageImage

I next moved onto the rear apron. The rear apron was not all that bad rust wise, but it had been hit a few times and was full of bondo. I drilled all the spot welds and removed it. When I went to fit the new one in place I wasn't real happy with the fit. The new one wasn't exactly perfect and required some tweaking to get it right. I had to start welding it in then coax it a little, weld a little, coax a little, you get the idea. I finally got it where I was happy with it and finished welding it into place, then finished it off with seam sealer.

ImageImageImage

ImageImageImage

Next I moved over to a couple small rusted holes on top of the LH heater channel. I welded a couple new little pieces of metal over those, then did the same in a little spot towards the rear underneath the LH heater channel. Phew! Now the metal work is done and I can start final finesse of the body and start priming and block sanding. I hope to shoot some color next week, because I'm taking a weeks vacation. Pictures of this weekends progress to follow.
User avatar
agggilli
Senior Member
Posts: 116
Joined: Fri Mar 19, 2010 7:15 am
Location: Greenville, NC

Post by agggilli »

I mainly worked on stripping all the paint off the body this weekend. I also did remove all the internal bracing I had put in during the heater channel replacement. I've stripped everything that will be seen. I'm not stripping the wheel wells or the trunk and engine bay, because that paint is all still pretty nice and solid. I figure it has been on there for forty years, so there's probably nothing I can add to make it any better than it is. Stripping everything else that is seen should make for a nice smooth paint job. I bought one of those HVLP turbine paint guns from TP tools to paint the bug with, and I'm anxious to see how it works. It puts out 5 psi at 62cfm with no worry about water or oil getting in the paint. Updated with the stripped body shots.

ImageImageImage
Last edited by agggilli on Fri Jun 04, 2010 5:43 am, edited 1 time in total.
User avatar
jmartini
Administrator
Posts: 1316
Joined: Fri Dec 23, 2005 8:43 pm
Location: Nevada, Texas
Contact:

Post by jmartini »

It's really looking great! Really nice job so far!
User avatar
agggilli
Senior Member
Posts: 116
Joined: Fri Mar 19, 2010 7:15 am
Location: Greenville, NC

Post by agggilli »

I have been on vacation all week and working on the car. It hasn't seemed very productive though. Monday I didn't work on it, as it was the holiday and after working on it Saturday and Sunday, I felt I would spend the day with my wife relaxing. Tuesday was a good day, and I spent 9 hours working on it getting final touch ups and filler leveler in areas needing it.
Weds. sucked as I only got about 4 hours worth of work done. I had to go to the eye Dr., as I had gotten a piece of metal in my eye on Friday when I was grinding on the body (yes I did have my safety glasses on). I didn't realize it at the time it happened, I noticed it Saturday morning when I woke up. Anyway, since it was the holiday weekend I decided to not call in the eye Dr.. I finally called on Tuesday, and they would have gotten me in, but the wife had the car, and I had plenty of work to do, so I just made the Weds. appointment.
So I go in, and yes there was metal, and it had rusted since I waited so long. She removed the metal and abraded the rust out, then put in drops and a protective contact lens, so my eyelid wouldn't rub it. I got a prescription for some steroid drops and left in my sun glasses.
Next I went to the auto paint store and bought my paint. I got Chevy black for the lower portion of the two-tone and R484 Dark Maroon for the rest of the car and a nice set of Duroblock sanding blocks. I went with base/clear paint and am getting excited to be getting closer to seeing the body in color.
Finally, I went to get my prescription, so by the time I got home to work on the car it was noon. I had to leave to pick up my wife at four, so only four hours of work accomplished, what a wasted day. I spent that time welding on new weatherstrip retainer channels on the entire front. I also welded up some cracks in the body right where the door hinges bolt on. I had seen them early on, but forgot about them until I saw them again when I was stripping the paint.
Yesterday I finally got to shoot some paint. I did a quick once over body sanding, masked off everything I didn't want the etching primer to get on and wiped the hole works down with prep solvent. Finally, at about 6:00 PM I got to shoot the pee green. I have a lot of time consuming gray primer, block sanding, gray primer, block sanding, etc. ahead. I'll start that today. I figure I am probably two weeks worth of evenings away from shooting the final color.
Oh yeah, the new paint turbine worked good. There is hardly any overspray at all. My garage floor had a very slight amount just under the car. Nothing on any of my tools, benches, etc. Also, I used my old CPAP machine set outside the garage with 18 feet of hose and my old full face CPAP mask to create a positive pressure breathing apparatus. It really worked good, and all I had was nice clean air to breathe while painting. Beats paying over $700 for one designed for painting. All I had to buy was $20 worth of hose off Ebay. Anyway here is a shot of the primered body and the paint turbine.

ImageImageImage

ImageImage
Last edited by agggilli on Fri Jun 04, 2010 7:36 am, edited 1 time in total.
User avatar
agggilli
Senior Member
Posts: 116
Joined: Fri Mar 19, 2010 7:15 am
Location: Greenville, NC

Post by agggilli »

I almost forgot, I also spent part of yesterday doing installation instructions and taking pictures of the custom shift boot and e-brake boot installation. I think I mentioned a couple of months ago, I was working with RedLine Goods in Poland to get some custom Italian leather boots made. They did not offer them for the VW bug. I contacted them, and they said if I wanted to provide them measurements, details, written installation instructions and installation photos, they would provide me mine for free. The catch was I had to give them a $100 deposit ($50 each boot), supposedly to be refunded once I held up my end of the deal. They claimed they only did this, because in the past they would send the boots only to not receive the instructs from the person they were working with. So anyway, I did the installation photos yesterday, 42 in all, and sent them in to the guy. Now we shall see if they are good to their word or not, and refund me back my deposit.
They are very nice quality Italian leather. If you go to their site, www.redlinegoods.com you will see all the color choices and styles you can choose from. They have multiple stitching, beading, etc. Now that have done this for them, they should be able to offer it to anyone with VW Beetle 59 - 77. I did mine in two-tone burgandy maroon and tan, the colors that my interior will be.
Disregard the carpet in the photos, as I just got some at Lowes to use for the installation photos. Also, I had to use the stock shifter for the installation photos. My actual shifter is an Empi trigger shifter, and the boot works on it too, although it is a little tighter. Here are a few pictures on the boots installed. Also, my friend got my dash pieces done and sent them in to me. They are all nice but I believe the center set will be the set I use. I really like the cherry finish and think it will set off nice in the tan interior with the maroon dash.

ImageImageImage

ImageImage
User avatar
rokemester
Senior Member
Posts: 274
Joined: Wed Mar 18, 2009 9:46 pm
Location: Cleveland, Ohio

Post by rokemester »

Wow the car is really coming together! Beautiful work. You will have some serious pride of ownership with this BUG.
User avatar
agggilli
Senior Member
Posts: 116
Joined: Fri Mar 19, 2010 7:15 am
Location: Greenville, NC

Post by agggilli »

I got up this morning at 4:30AM, so I could beat the heat and shoot a gallon of gray primer on the car. I shot the whole wad by 7:00AM and the outside temperature was already starting its way up. It is in the middle 90's today and is supposed to be that way all weekend. My garage is not insulated, so when it is this hot my little AC unit won't keep up. I pushed the car outside for few hours and let the paint bake in the sun. I'll probably start some blocking tomorrow now that I have some paint thickness on it. I'll throw a little red oxide primer mist coat on it and see what I have to work with. Now here are a few shots of it in gray.

ImageImageImage

Image

As you can see, I now have the frunk, engine bay and wheel wells primed as well.
Oh yeah, on a separate note, Redline Goods is now showing the beetle as an available choice for the custom shift boots and e-brake boots. They took a few of my photos and put them on the site as installation instructions, as well as a few of my written instructions. If anyone wants custom leather boots you can now get them at www.redlinegoods.com. If you need complete installation instructions, I'm sure they include them with the boots, but if for some reason they don't, I can post up what I sent them. Also, they were true to their word and refunded my $100 deposit I had given them, so it was worth the effort. I got my own custom boots for free, plus now anyone with a VW Beetle can get them.
thetinkerr
New Member
Posts: 3
Joined: Sat Apr 10, 2010 9:49 pm
Location: Kennewick WA

Post by thetinkerr »

You are doing a great job on your bug. I checked out your boots and they are on sale for 69 bucks!!! I'm ordering mine today. Again, Great job!!! Kevin
User avatar
micmaclopez
Member
Posts: 10
Joined: Mon May 17, 2010 9:01 pm
Location: Zamboanga City, Philippines

Post by micmaclopez »

nice project and beetle you got there. ill be watching your project. very nice.
User avatar
agggilli
Senior Member
Posts: 116
Joined: Fri Mar 19, 2010 7:15 am
Location: Greenville, NC

Post by agggilli »

So it has been awhile since I updated this. I have been block sanding for the past few weeks off and on. It has been wicked hot down here, and I only work on it for a couple of hours or so a few days a week. The block sanding is a necessary evil to having a nice wave free paint job. It is extremely boring and time consuming. Anyway, I finally finished the block sanding and wet sanding on the sides and decided to go ahead and shoot my black paint. I'm using a base coat/clear coat urethane paint system, and the car is going to be two-tone maroon over black. I shot two coats of base followed by two coats of clear. Next I'll shoot the Maroon, but I need to do my second go round on the top block sanding. Technically, I should have had that done and then just shot it all at the same time, but I needed a little enthusiasm boost and needed to see some actual paint on the fruits of my labor. Since I will be sanding both the black and the maroon with 1500 grit and then re-shooting the whole car with another coat of clear, it really doesn't matter. So without further adieu, here are some photos of it all masked off and then the nice shiny black with clear.

ImageImageImage

ImageImageImage

ImageImage
pira114
Senior Member
Posts: 83
Joined: Sat May 17, 2008 11:13 pm
Location: California-South of the funny city

Post by pira114 »

All I can say is I'm jealous! Very nice. Can't wait to see the final product.
--------------------------------------------------

This nation will remain the land of the free only so long as it is the home of the brave. ~Elmer Davis
User avatar
micmaclopez
Member
Posts: 10
Joined: Mon May 17, 2010 9:01 pm
Location: Zamboanga City, Philippines

Post by micmaclopez »

nice paint, cant wait for more updated photos.
Post Reply